User management
All user management can be done in the Users tab.
1. Adding new user
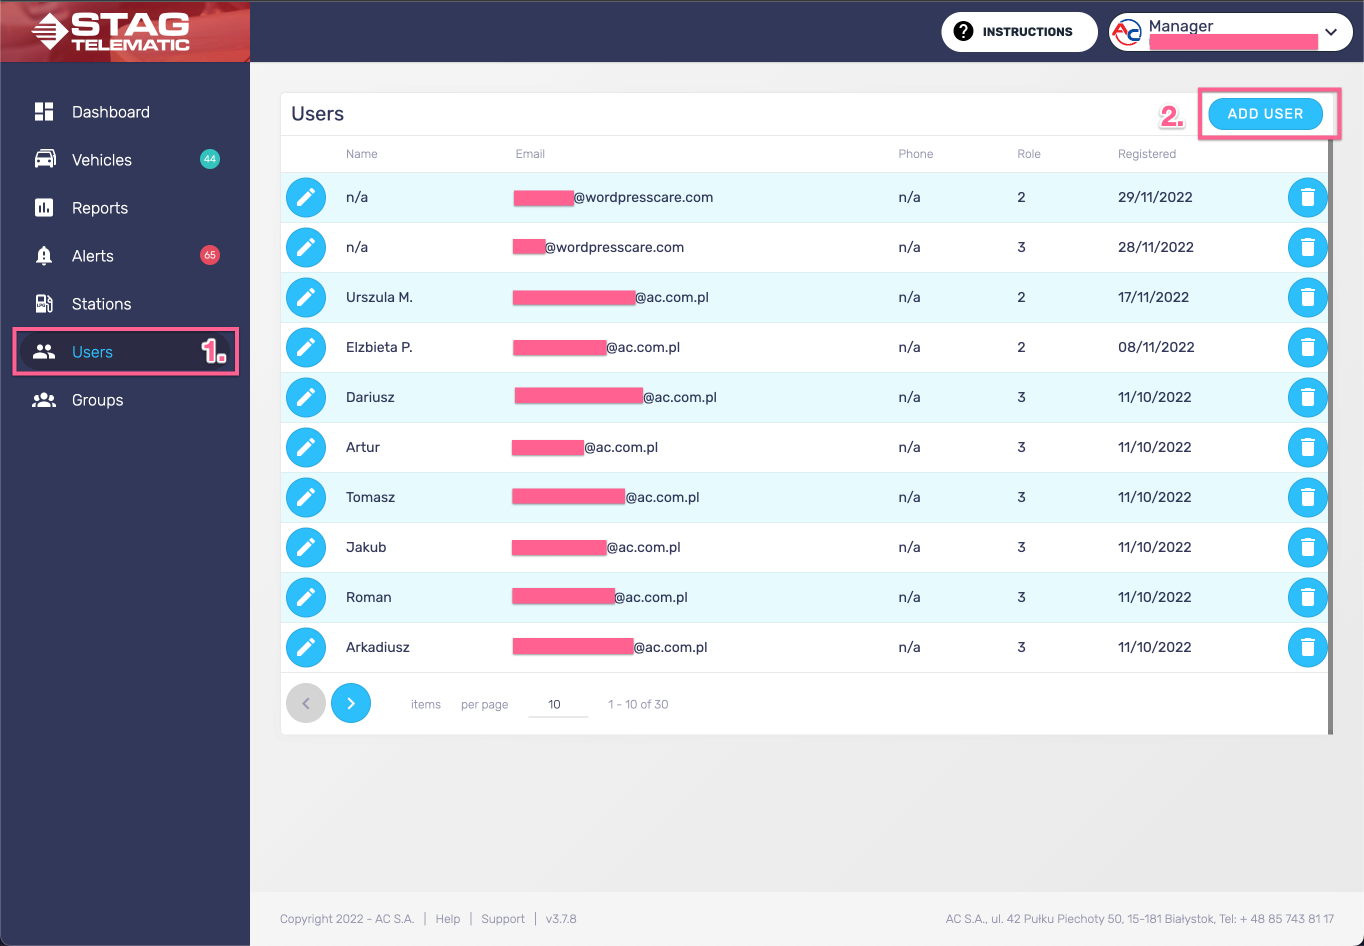
After selecting the Users tab from the sidebar navigation, click the button in the top right corner "Add user" (figure 1.1)
You will be presented with the "Add user" screen. Fill in the details and submit the form by pressing the button "Add user" (figure 1.2).
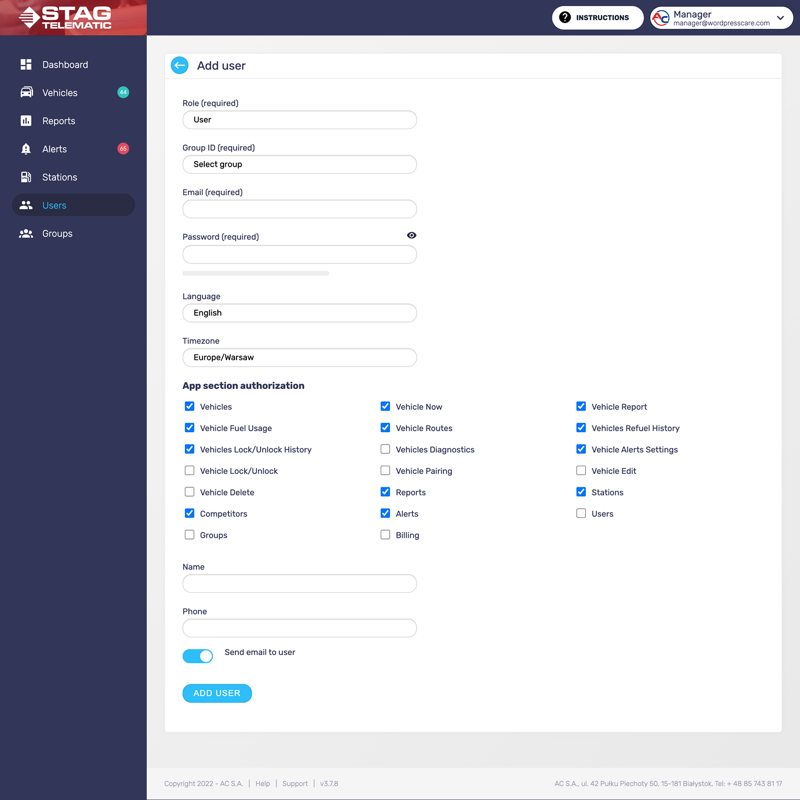
You will be presented with the "Add user" screen. Fill in the details and submit the form by pressing the button "Add user" (figure 1.2).
Role
There are currently six authorisation roles.
- 1. Superadministrator
- 2. Administrator
- 3. Distributor
- 4. Manager
- 5. Technician
- 6. User
Superadministrator - The Superadministrator role is the highest one and is available only to the application developers.
Administrator - The administrator role is similar to Superadministrator without having access to some development tools.
Distributor - The distributor role is a role that can be given to local distributors to be able to manage multiple accounts.
Manager - The manager is a role for someone who manages a fleet or fleets under one account. They have access to the groups where they can sort vehicles and users into groups and manage their rights and access to a certain part of the application.
Technician - Mechanics is a role that is assigned to the person who installs a module to the vehicle. They can create, edit and remove the vehicle from the application.
User - User is the most common role dedicated to the end user. They have access to the reports, routes and alerts. Their access can be further restricted.
Groups
This select box gives the choice to add a user to one or some of the available groups created by the account manager or administrator.
This must be a valid email that the user can access. This is the login ID as it is the only way to recover a lost password.
Password
This will be the password that the user will be using to sign into the application. It should be at least 8 characters long and should include numbers. The password strength meter is a good indication of how good your password is. Users will be able to change this password after they log into their newly created accounts under the Settings tab.
Language
There is currently only one language to choose from - English. It is however possible to use the browser build feature to translate the app on the fly.
Timezone
Make sure to match the timezone to the end user's current location. This will avoid some issues with hours being off +/- a few hours.
App section authorization
Here (based on the user role) access to certain app sections can be assigned. Some of the tickboxes might be disabled by default meaning the given role can not have access to those sections.
Name & Phone
Name and Phone fields are optional. They only serve as an option to easily communicate with the given user.
Send an email to the user
If toggled on, an email will be sent to the user, informing him that the account was created. This won't send the password to the user. You can either send the password in a separate email or let the user reset the password via forget password link that can be found on the login screen.
2. Edit the user

Editing the user can be done from the main User screen by pressing the "edit icon" (figure 2.1).
3. Removing a user

Removing the user can be done from the main User screen by pressing the "delete icon" (figure 3.1). Once the user is removed all user-related data are deleted and can not be recovered.